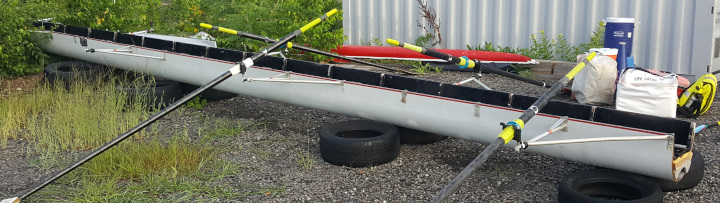
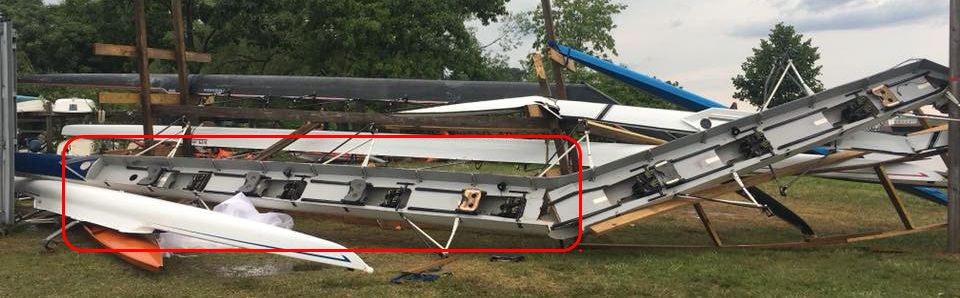
Mission: Save The Portion of HBS That Lies Inside The Red Rectangle.
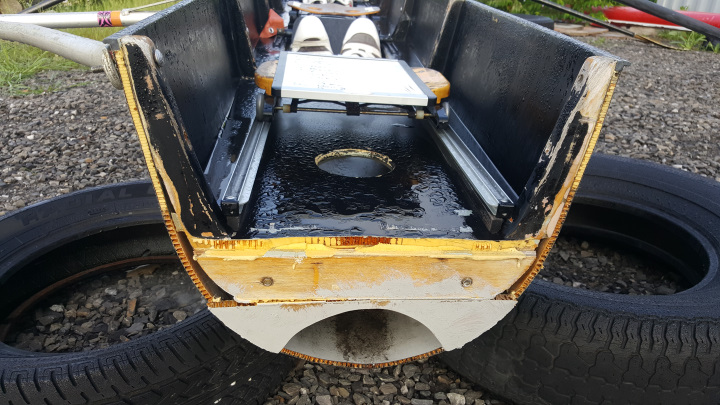
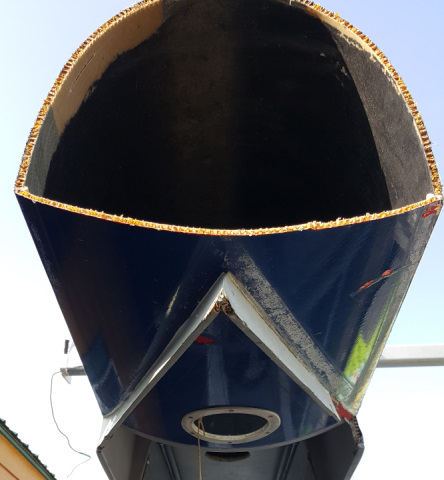
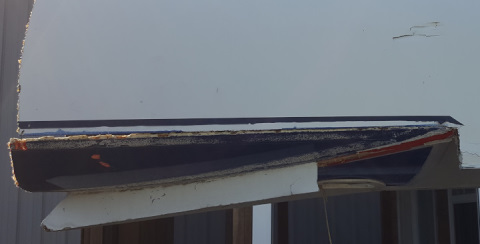
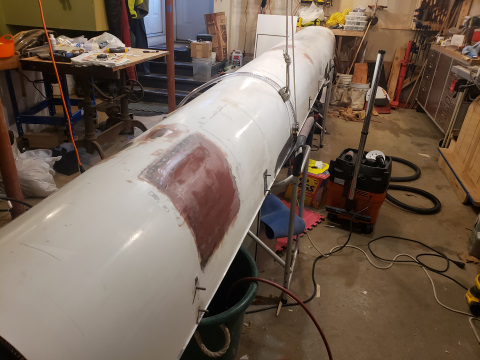
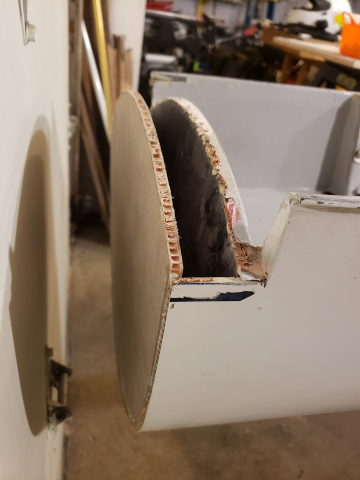
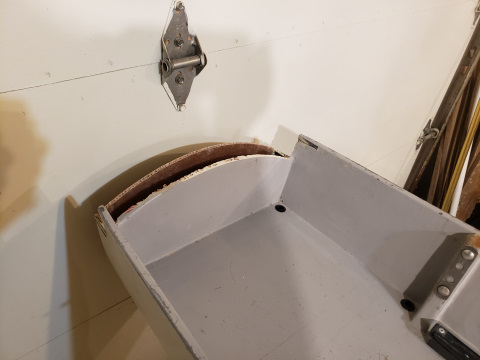
Mid-Hull Fracture
Make this stronger, cleaner, and safe to handle with bare hands.
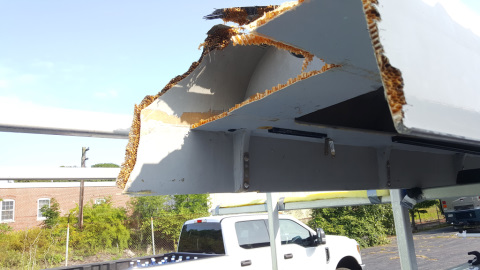
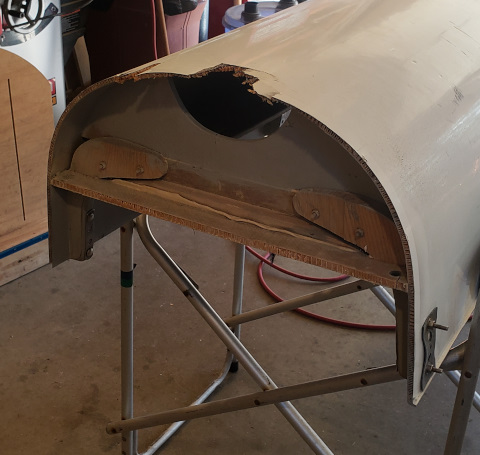
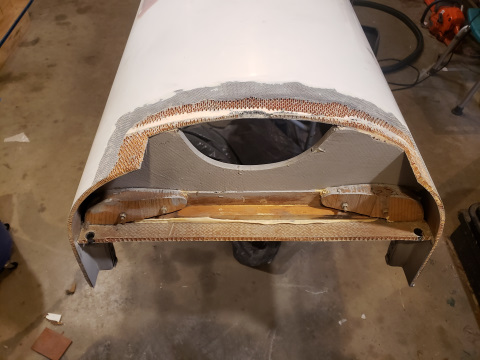
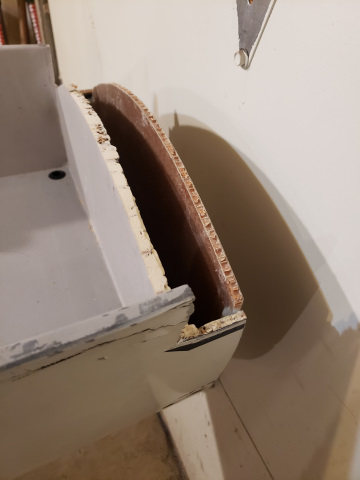
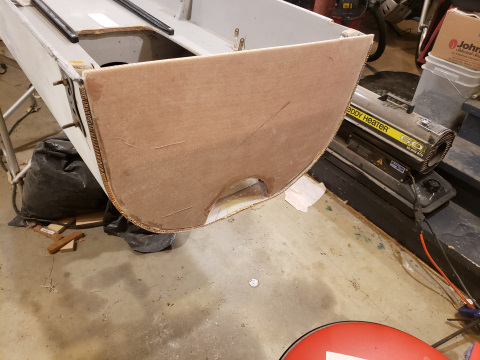
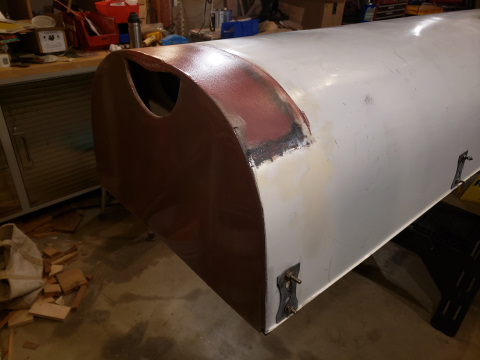
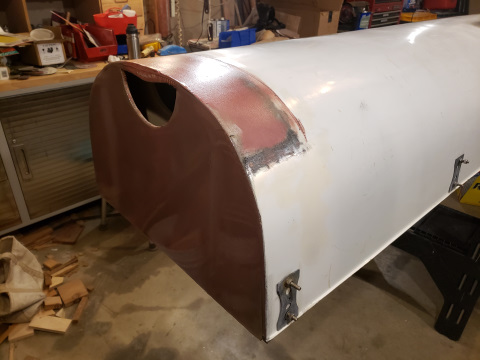
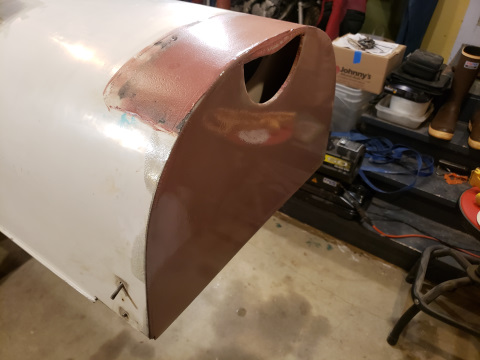
Extraneous Forward Hull Fragment
Remove the extraneous forward hull fragment, strengthen the new forward end, and make it safe to handle with bare hands.
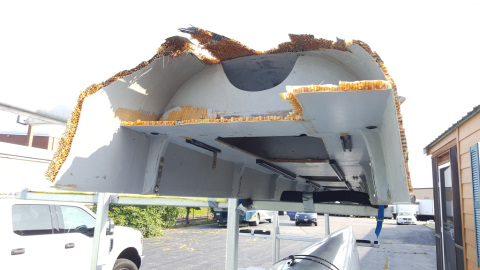
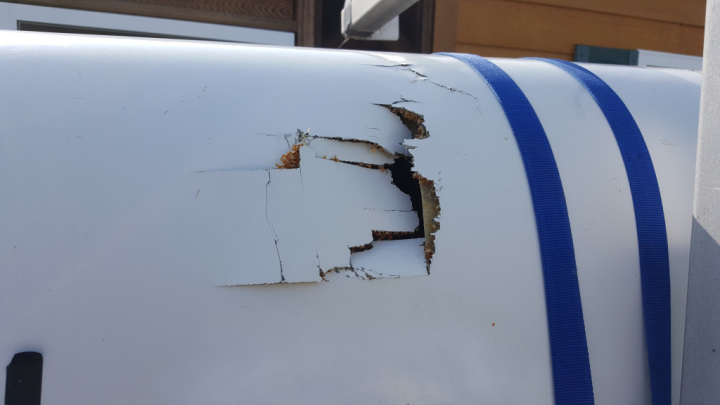
Repair Hull Breaches
This the worst. There are several less serious breaches as well. All pose risks to bare hands.
Make the trainer safe to handle with bare hands, resistent to weather, and rugged enough to handle its new function.
Repair structural hull damage; seal hull breaches.
Cover exposed reinforcing fibers and honeycomb core.
Reinforce each end of the hull with a second bulkhead.
Test: Creating Composite Parts With Vacuum Bagging (4 minute time-lapse video)
Vacuum bagging improves the efficiency of composite parts by compressing them and removing excess resin.
This video shows most of my steps as I created a pair of small test parts. (Sorry, I sometimes forgot to turn on the camera after a break.)
The parts are of a type that I will need for the new dry-land trainer, and probably in the Wintech repair as well. They comprise a core of lightweight honeycomb sandwiched between layers of fiberglass fabric and West System epoxy resin. There were slight differences in how I layered the two parts, which I hope will help me choose the best option for the real parts.
Once I had the parts wetted with fresh resin, I put them under the vacuum process. Between 3:55 and 4:00 of the video, you can see the outer bag collapse and begin compressing the parts.
The parts remained under vacuum for 8 hours.
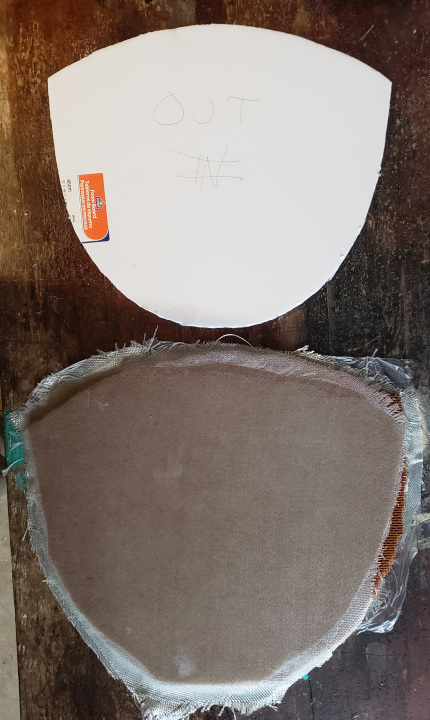
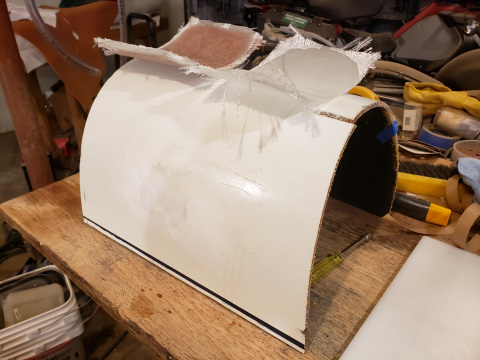
Test Parts Built in Previous Step
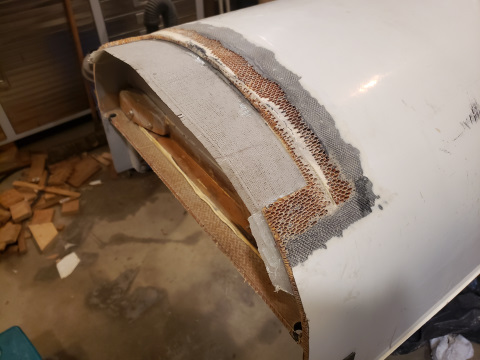
Creating The Forward Reinforcing Bulkhead
The first real part in this project!
Vacuum bagged in the same way as the test parts shown above.
The second photo below shows the cured bulkhead panel with the template I'll use to give it its final size and shape.
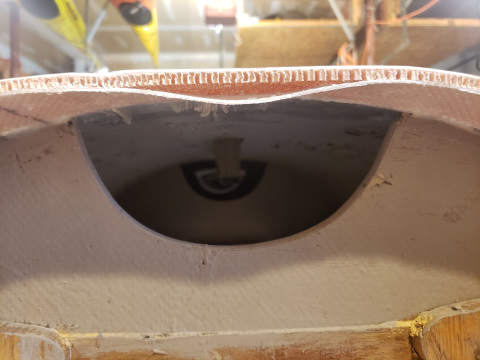
Fitting Forward Bulkhead for Bonding (5 minute time-lapse video)
Today I trimmed the forward bulkhead blank to fit into the forward end of the hull. I trimmed repeatedly, checking the fit often to ensure I didn't over-trim. (My apologies for the frequent heater and compressor noise!
Now that it fits, the next step (after I turn the hull upright) will be to bond it in place and then seal it with glass fiber and epoxy resin.
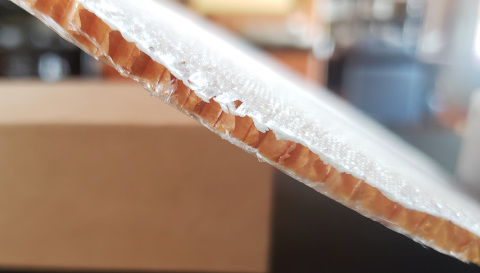
Note below that the hull itself is made from the same sort of honeycomb core composite that I used to build the blank for this bulkhead.
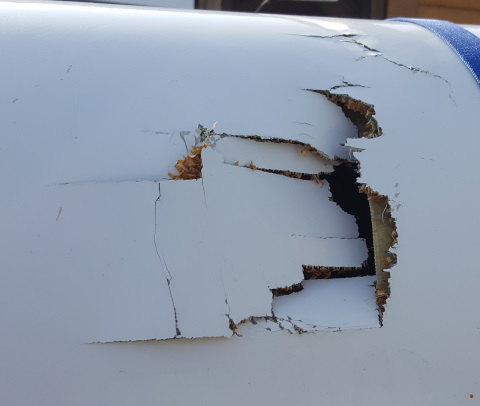
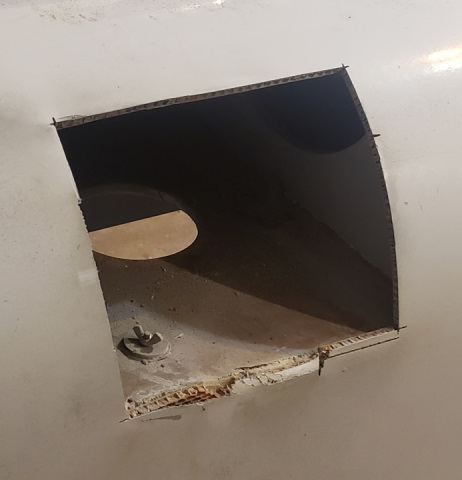
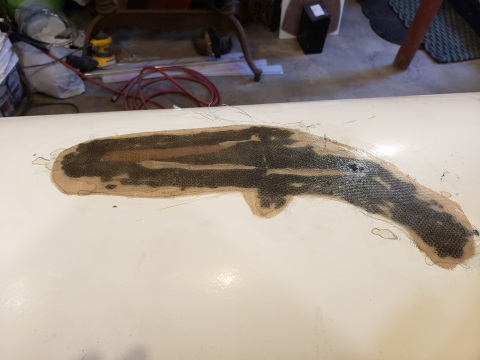
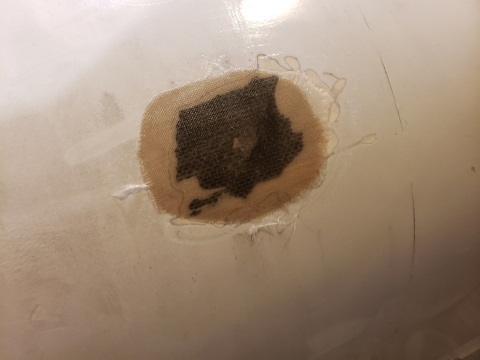
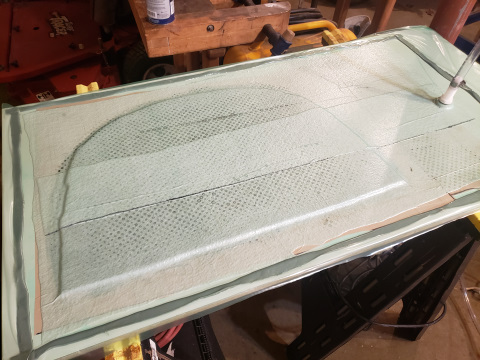
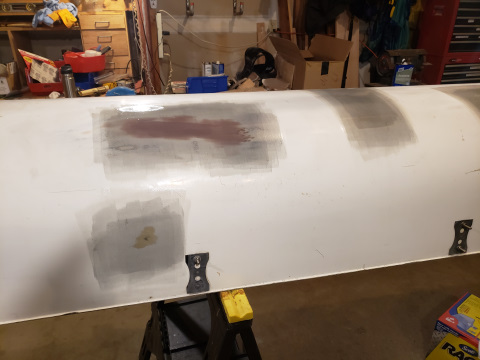
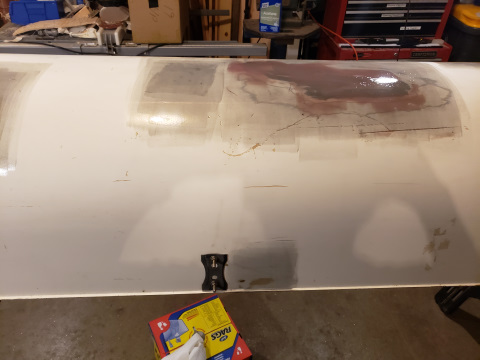
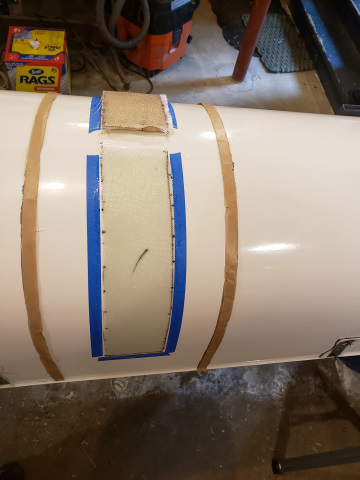
Begin Prep for Breach Repairs
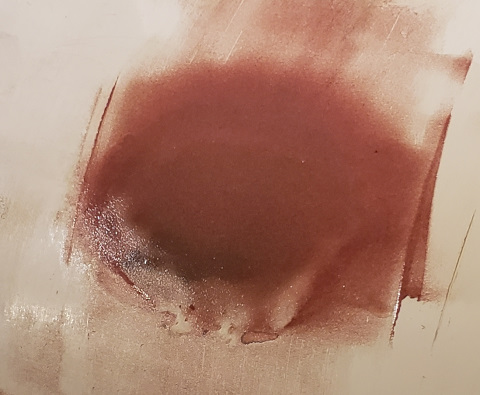
Original state and current state of the worst breach.
Also, the next most serious breach.
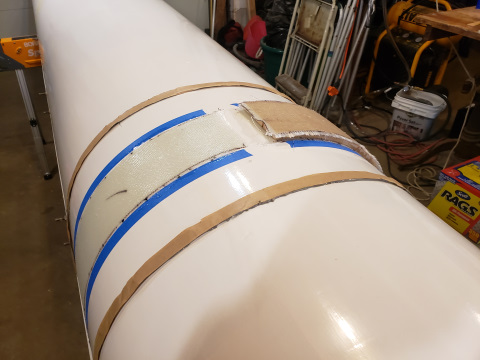
First Hull Breach Repairs
The most extensive damage I repaired today had a significant void to be filled. Fortunately, the underskin was intact, which allowed me to clean out the damaged honeycomb, replace it with new honeycomb, and then apply a new topskin of three layers of fabric and resin. (Since we don't need the lightness of carbon fiber for this land-based trainer, I used glass fiber instead. Although it's heavier, it's cheaper and stronger.)
The other damage I repaired today didn't require any filling, so I just applied three new fabric/resin layers over the prepped surface.
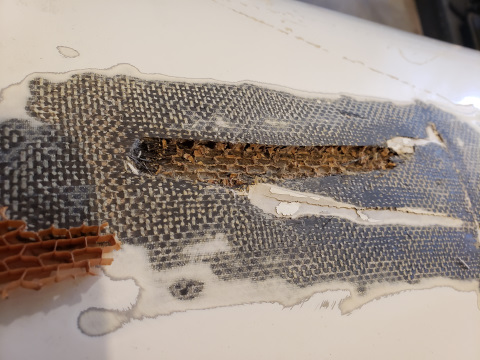
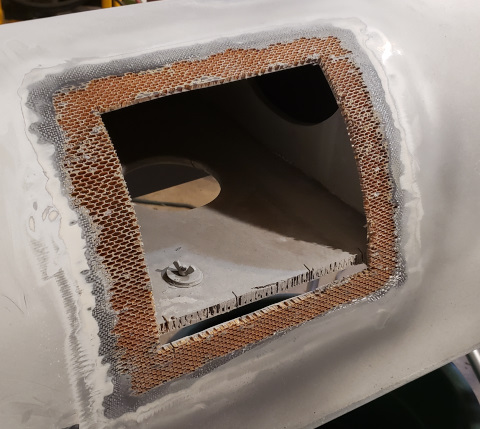
The Big Breach
Below is the major breach in its original and current conditions.
The patch will comprise an inner skin, a honeycomb core and an outer skin.
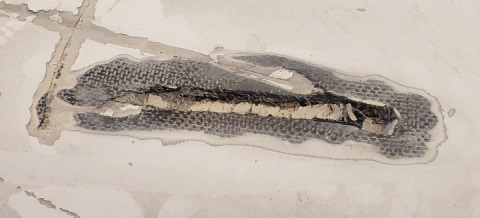
Can I safely use the hull itself as a mold for the new inner skin?
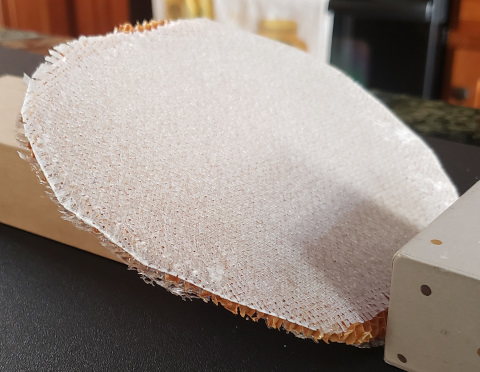
I vacuum bagged some test parts atop a hull fragment. One of the parts is a honeycomb cored sandwich. The other part is a simple fabric-only composite sheet.
The cured parts came off the 'mold' cleanly, without damage to the parts or to the hull fragment.
I can safely use the real hull as a mold for the inner skin of the new patch!
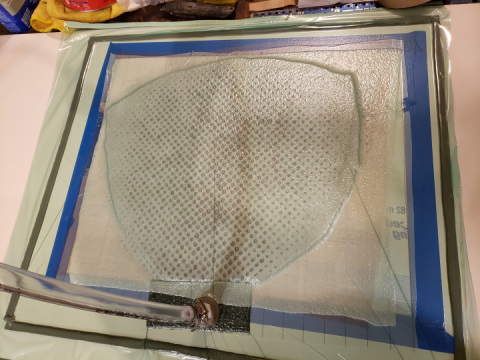
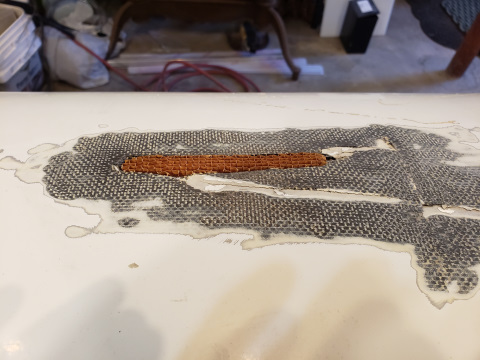
Creating The Replacement Inner Skin
I molded the 3-ply replacement inner skin directly on the hull next to the breach itself, so it has the same curvature as the section to be patched.
Next: Bond the replacement part to the inside of the hull behind the opening, then build the rest of the patch one layer at a time from the inner skin outward.
Fitting And Bonding The Replacement Inner Skin
Trim and shape the replacement part to fit against the inside of the hull.
Bond the part to the existing hull with thickened epoxy.
Temporarily brace it in place until the epoxy cures.
Next: Start building out the remainder of the patch as soon as the bond is sufficiently cured -- 24 hours or less.
Fitting The Replacement Honeycomb Core
Trim and shape new core material to fit the slightly irregular shape of the void.
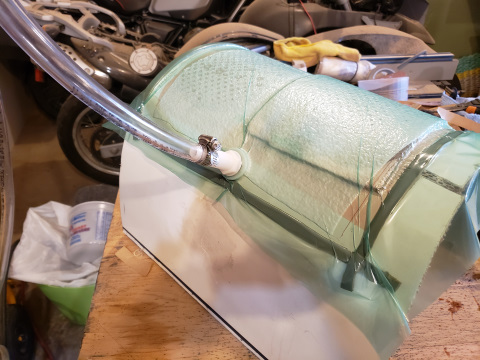
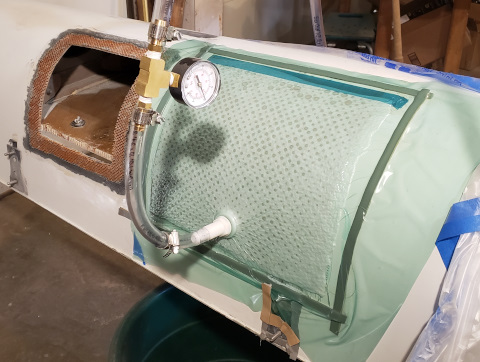
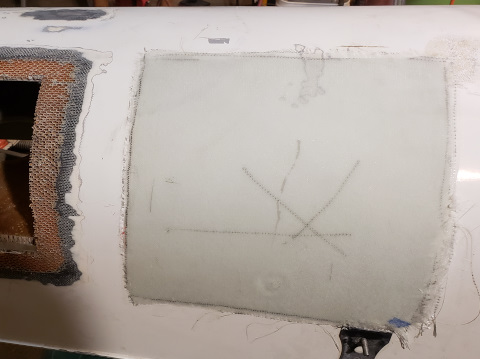
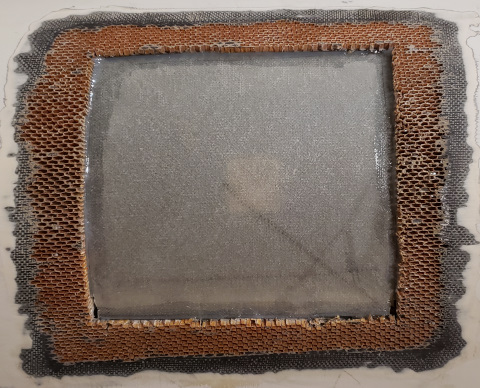
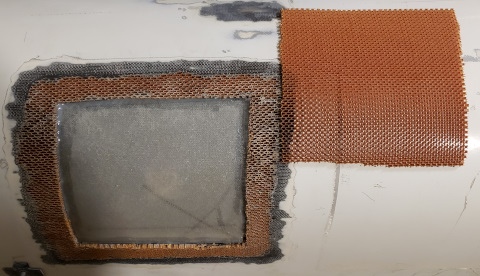
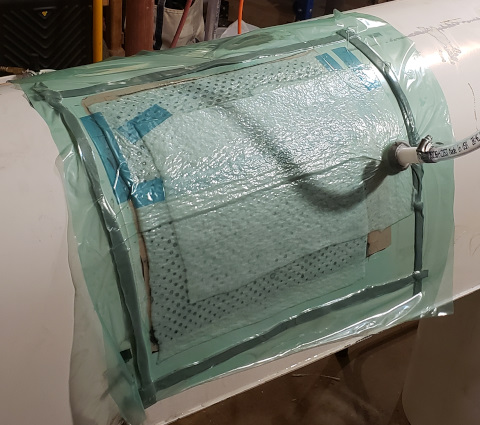
Patch Complete
Patch fully built and curing under vacuum.
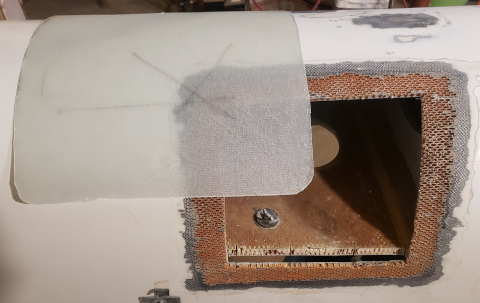
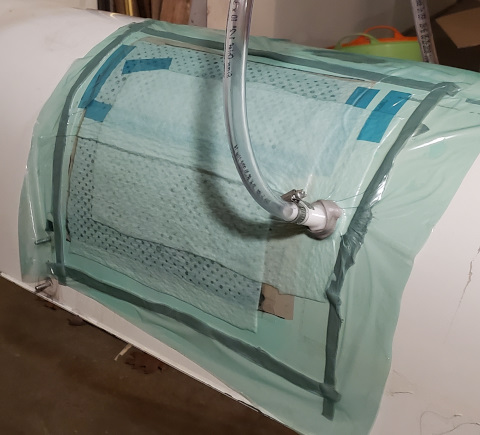
Final Cure
Vacuum bagging materials stripped from patch.
Next: Begin fairing (smoothing) to match the rest of the hull.
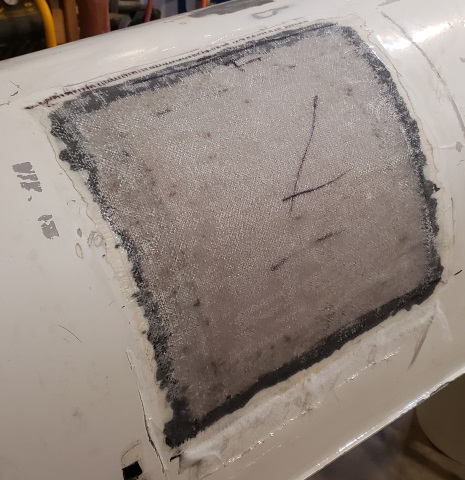
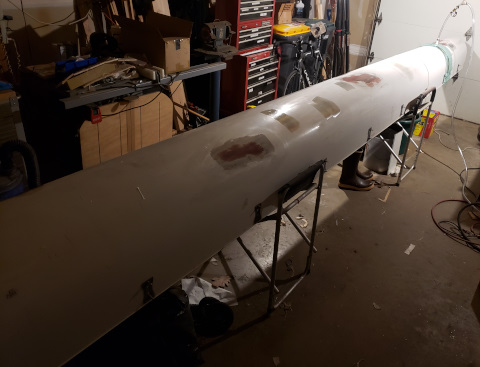
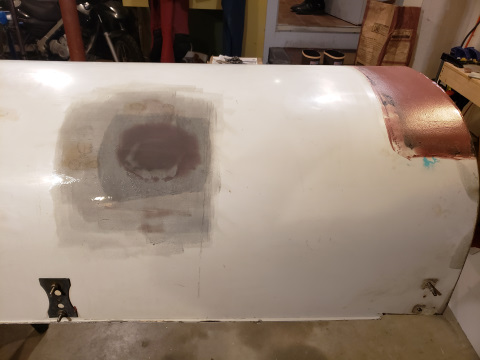
Fairing The Hull
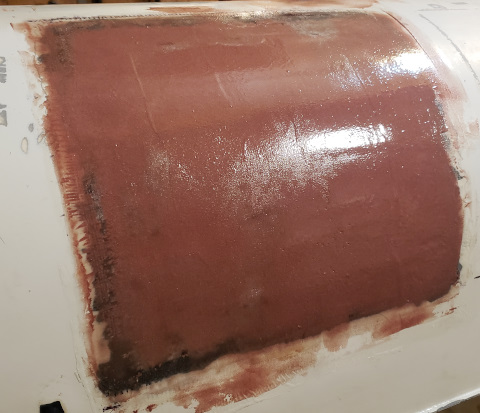
Sand each patch area.
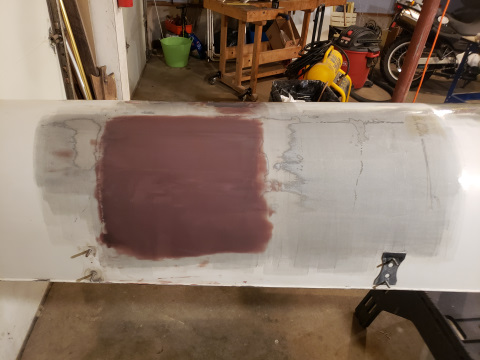
Apply fairing compound (an epoxy product) on each patch area.
Allow to cure.
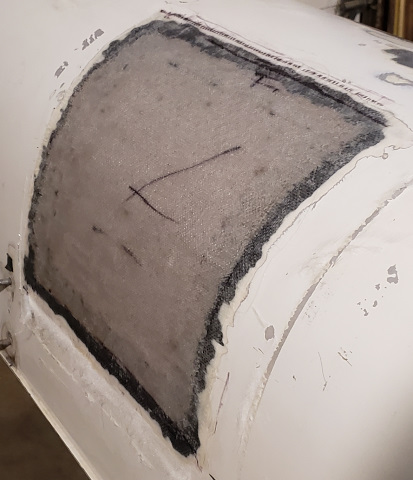
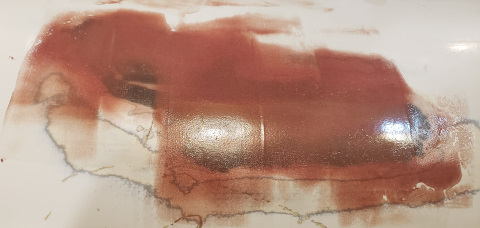
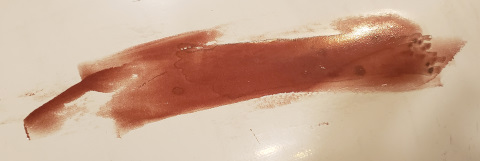
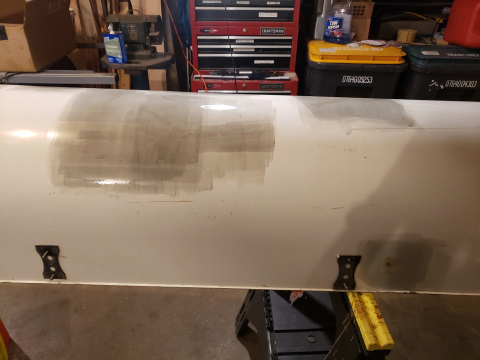
Fairing The Hull
Sand the fairing compound on each patch area.
Apply new fairing compound as needed on each patch area.
Allow to cure.
Repeat steps as necessary until the surface is fair enough to paint.
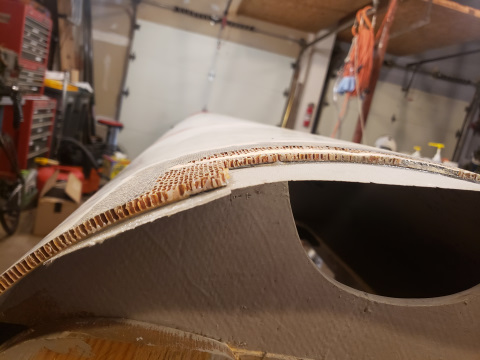
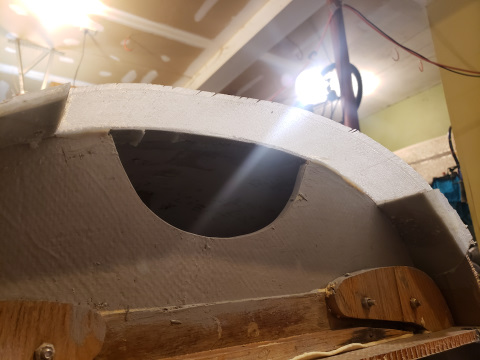
Earlier in this project, we partially cleaned up the hull where it broke. Now we want to strengthen this area, which formerly was the center of the boat (between seats 4 and 5), by adding a second bulkhead. Before we can do that, we need to fashion a honeycomb core patch for the hull, similar to the way we patched the big hull breach.
Prep The Hull For Patching (2 minute time-lapse video)
Clean and square the edges of the damage.
Bevel the edges of the area to be patched to increase surface area of the bond between the hull and the patch.
Recess the horizontal deck to allow for inset of the bulkhead.
Build The Bulkhead Blank
Lay up the 8-ply bulkhead blank.
3 layers 10 oz. glass fiber
Nomex honeycomb core
3 layers 10 oz. glass fiber
1 layer 2 oz. glass fiber, fine weave surface layer
Vacuum bag the blank to maximize the fiber to resin ratio.
Allow to cure.
Begin Hull Patch.
Bond the patch foundation in place.
Clamps Off -- Foundation Bonding Complete.
Lay Up The Patch Over The Foundation. (5 minute time-lapse video)
Cut and fit the 3 layers (8 total ply): underskin, honeycomb, and topskin
First iteration of honeycomb rejected and replaced -- its cell pattern/direction didn't match the existing hull.
Lay each ply and wet out with resin.
(Camera battery died before layup was completed.)
Trim Hull Patch; Initial Fairing (3 minute time-lapse video)
Trim the patch flush with the rest of the hull.
Begin fairing the patch to flow smoothly into the the existing hull surface.
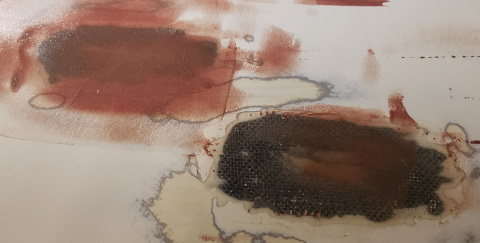
Build Error Creates A Complication
As shown below, I have a pretty serious fault in the cured hull patch. The underskin delaminated from the rest of the patch during the cure. I suspect I could have avoided this by allowing the underskin to cure for a couple of hours before laying on the honeycomb and topskin. That's now water under the bridge, and lesson learned.
Next Steps: Repair
The elegant solution would be to cut out the bad parts and rebuild. However, given that time is short, the final product will stay on land, and thus the final hull shape is not critical, I think I will go a quick and dirty route. I'm just going to fill that void with thickened epoxy and move on.
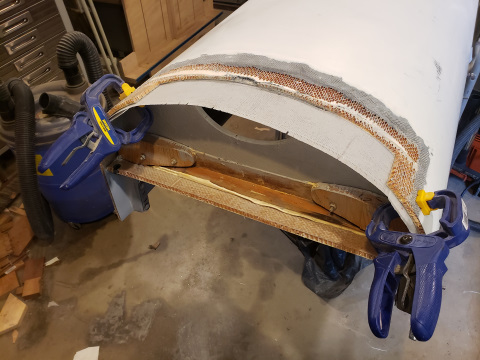
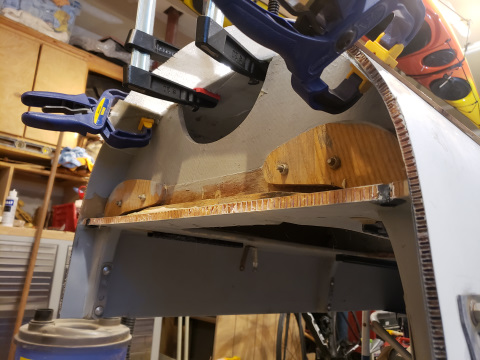
Forward Bulkhead
After Bulkhead
Concurrent Curing
Multiple areas of curing fairing compound.
Multiple areas of curing barrier coat (moisture exclusion and abrasion resistance).
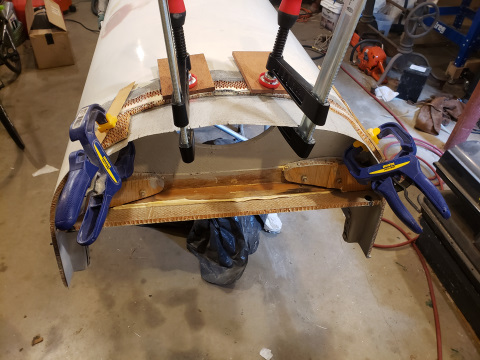
Up at the bow, the second pair of cradle arms curing under vacuum overnight.
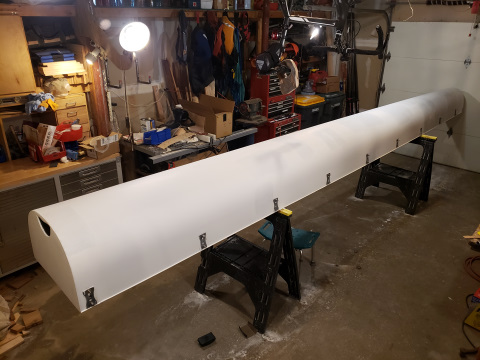
All areas that need barrier coat have at least 4 layers of it. Tomorrow morning the boat gets primer. Sunday morning it gets topcoat.
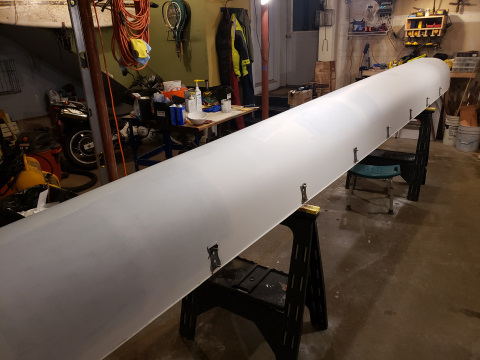
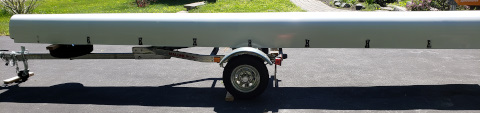
Current Hull Condition, Port Side, Bow To Stern
Current Hull Condition, Stern (Bow is similar)
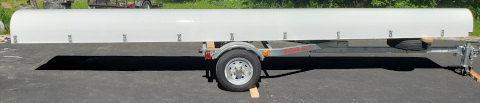
Current Hull Condition, Starboard Side
Repairs Made, Improvements Effected
But nothing shouts progress quite like a paint job (even if it's just primer).